

Open the hub
Click DevOps Hub in the sidebar under Tools. The hub has its own list on the left: Containers, Network Tools, Cloudflare, LAN Share, Mail Catcher, MCP Server and S3 Browser. The hub opens on Network Tools. If DevOps Hub is missing, turn it on in Plugins under BUILT-IN PLUGINS.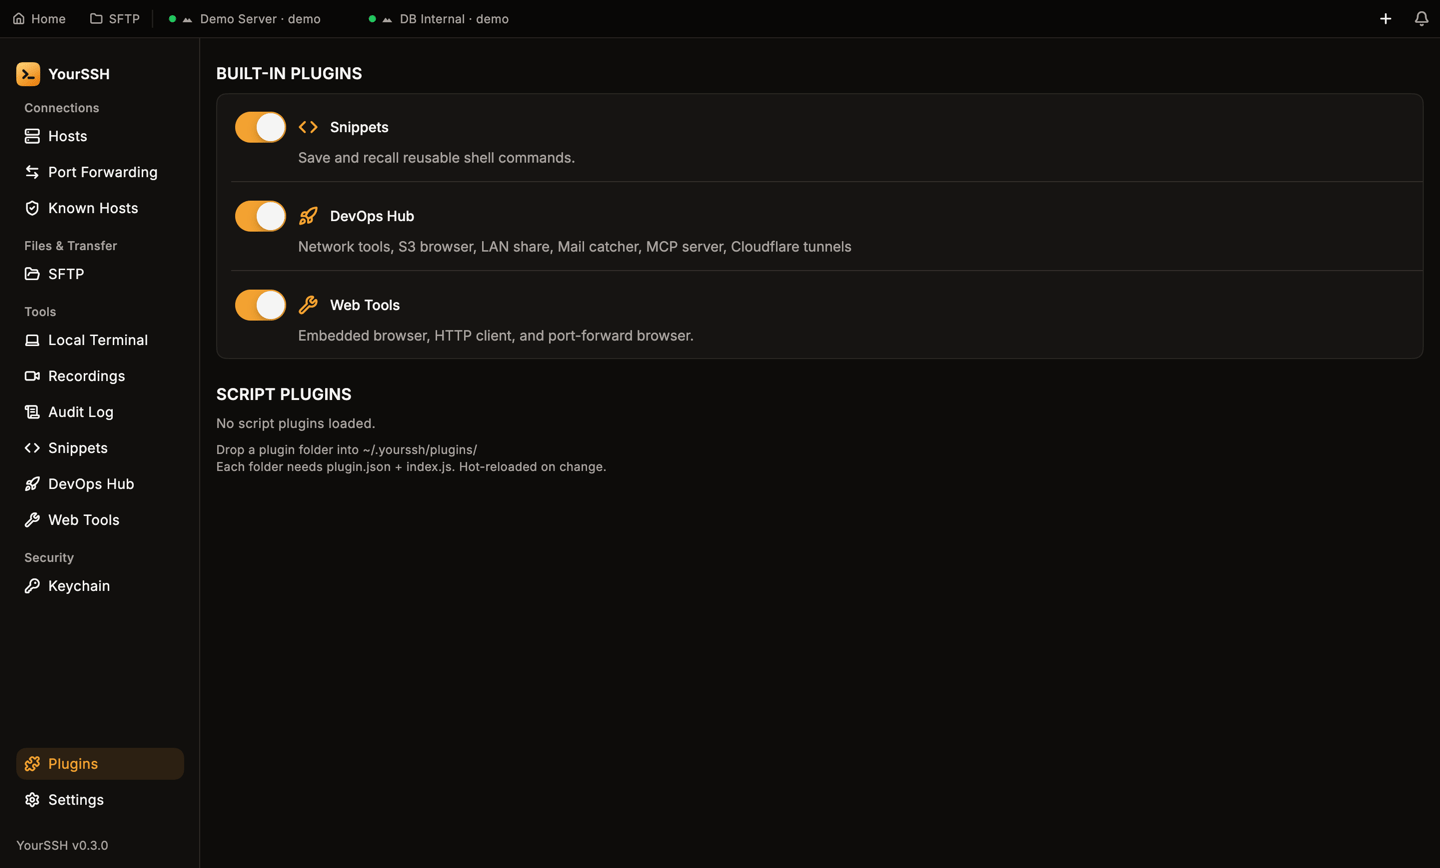
The Plugins screen. DevOps Hub, Snippets and Web Tools can each be switched on or off.
Commands the hub runs on a host are recorded in the audit log with the source
devops.Containers
Containers manages Docker, Docker Compose and Kubernetes on the remote host.- Pick a session from the list at the top. If no SSH session is open, the tool asks you to open one first.
- Click the refresh button (Rescan runtimes), or Scan, to detect what is installed.
- Switch between the Docker, Compose and Kubernetes tabs.
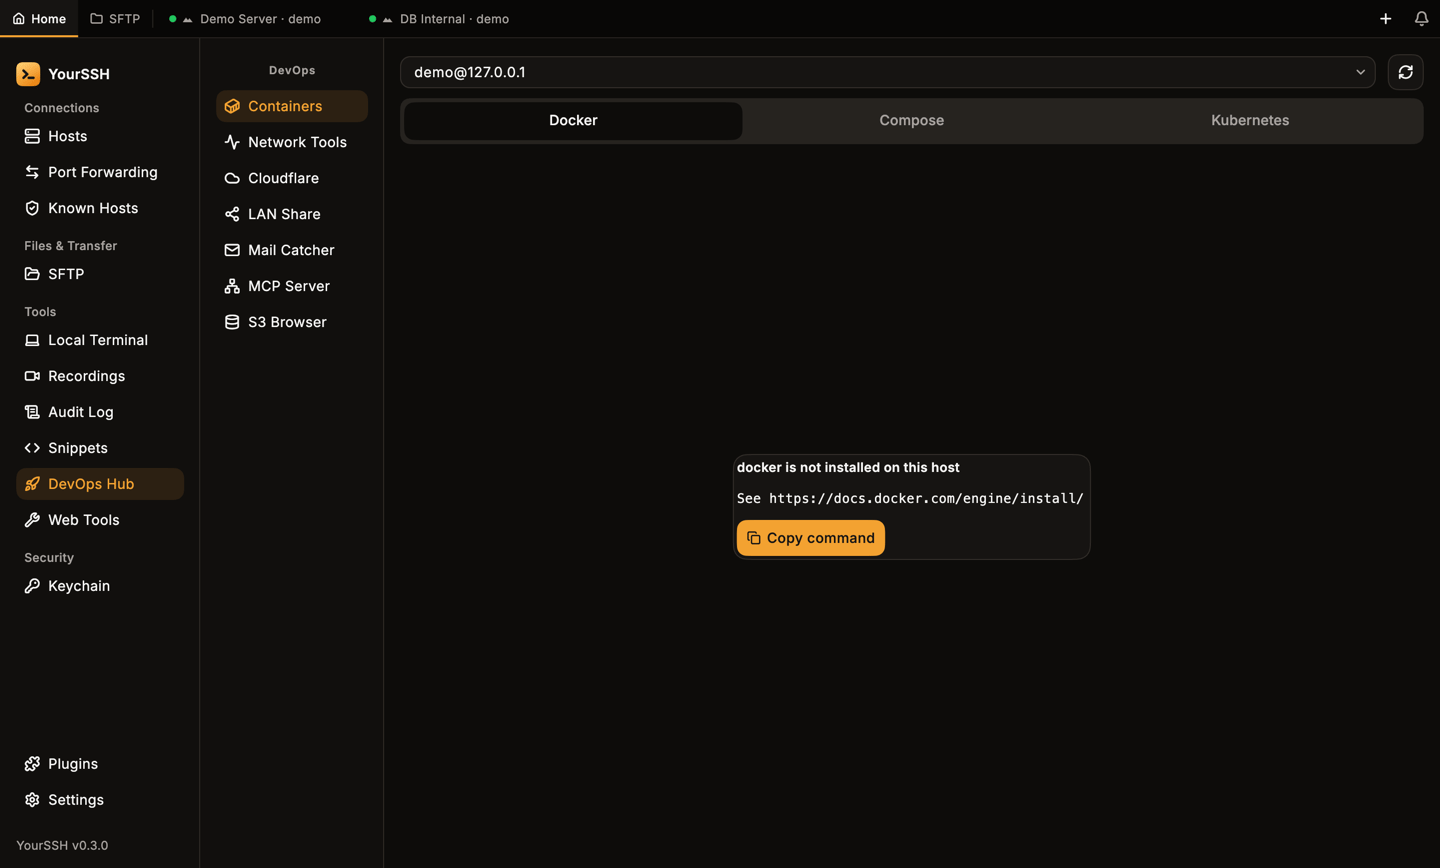
Docker is not installed on this host: the tab shows an install hint instead of an empty list.
Docker
The Docker tab lists all containers, running and stopped, with image and status. Each container has icon buttons. Hover one to see its name:Compose
The Compose tab lists Compose stacks found on the host. Use Add path manually to add a stack that isn’t found. For each stack you can bring it Up or Down and select it to see its services. Down asks you to confirm first. For each service you can start, stop and open Logs. Docker Compose v2 is required.Kubernetes
The Kubernetes tab lists pods. Filter by Namespace or turn on All namespaces. For a pod you can Exec into a container, open Logs or use Forward port to forward a pod port to a local port.kubectl must be installed on the host.
Network tools
Network Tools runs diagnostics on the host of the active session. Pick a tool from the list. Most tools ask for a target such as a host, URL or path. Netstat, Top Processes and Memory Info don’t. Click the run button, which carries the tool’s name. Without an open SSH session the tool shows No active session — connect to a host first.
The commands run on the remote host, not on your computer. Each run opens a result tab. Use the copy button to copy the output and Clear all tabs to close them.
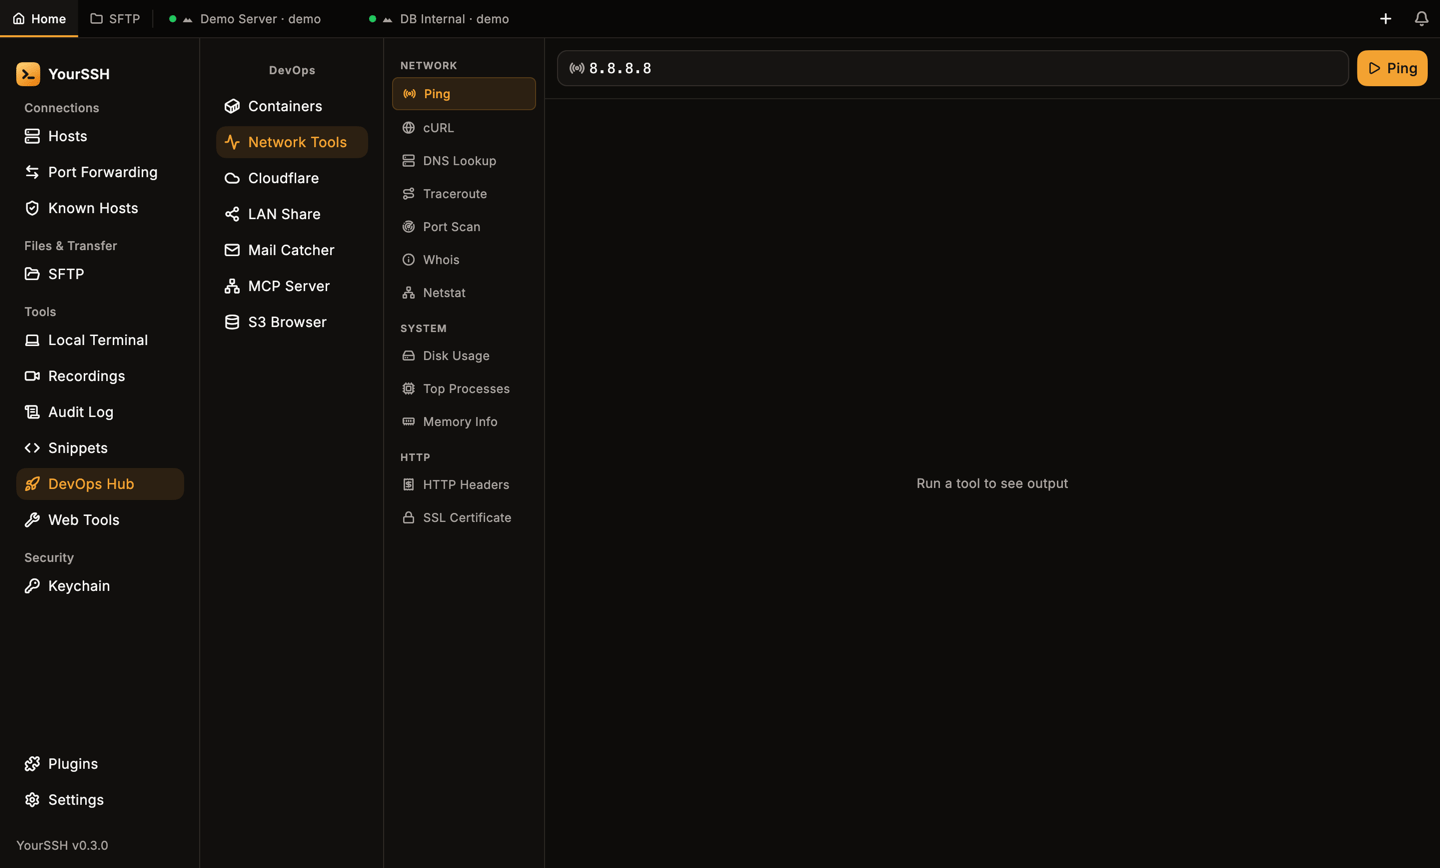
Network Tools with the tool list. Most tools take a target such as a host, URL or path.
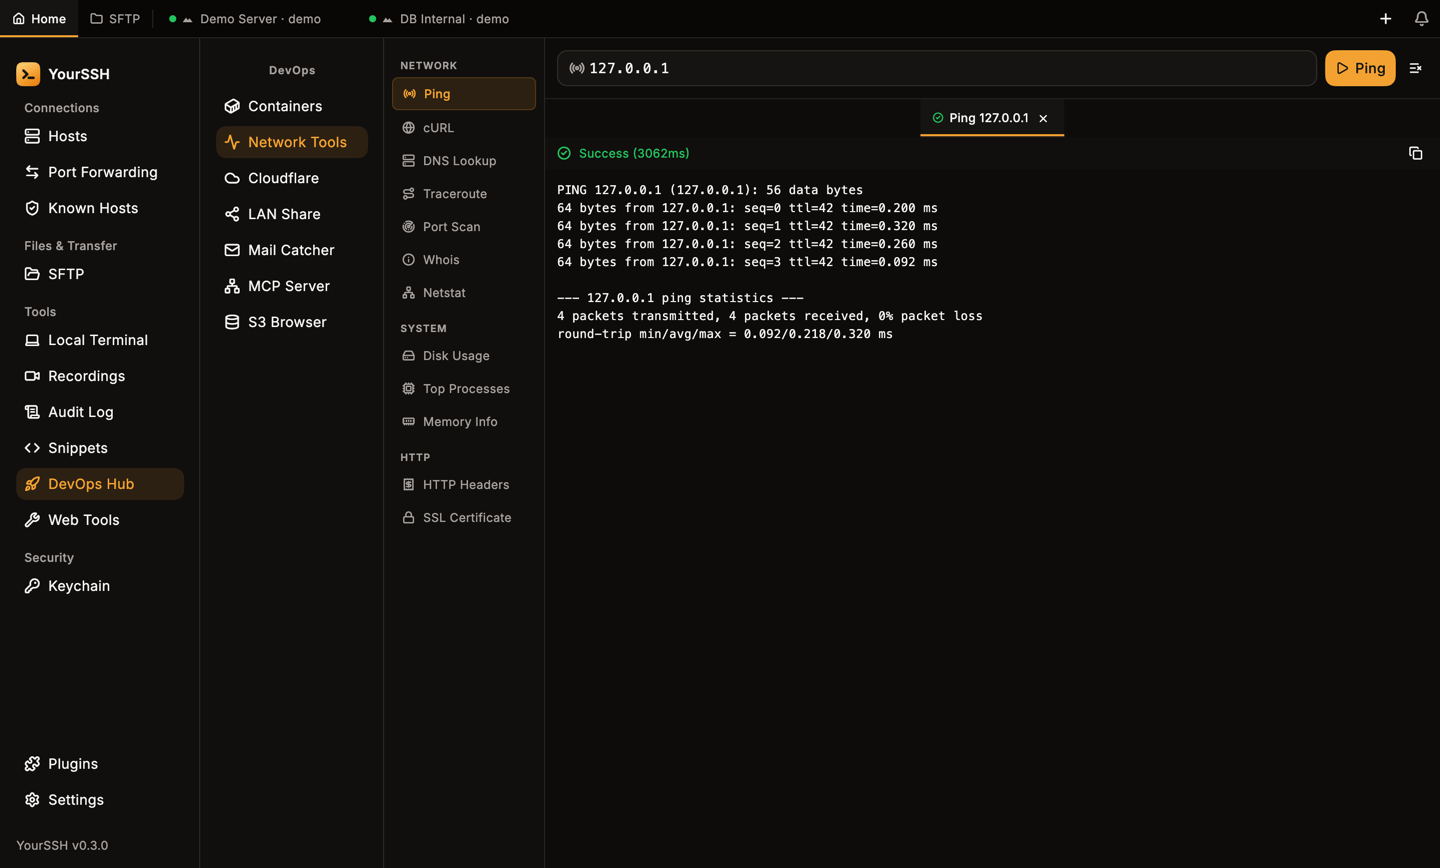
A ping result in its own tab, with the run time.
Cloudflare tunnels
Cloudflare starts a quick tunnel withcloudflared on the remote host and gives you a public HTTPS URL for a port on that host. Use it to share a dev server without changing firewall rules.
1
Connect to a host
The tool needs an active SSH session.
cloudflared must be installed on that host.2
Add a tunnel
Click New Tunnel. Enter a Label and the Local Port (1–65535), then click Add Tunnel. Empty or invalid fields show Required or Invalid (1–65535).
3
Start it
Click the start button on the tunnel. When it is running, use Copy URL to copy the public address. The stop button ends it. Remove deletes the entry after you confirm Remove tunnel.
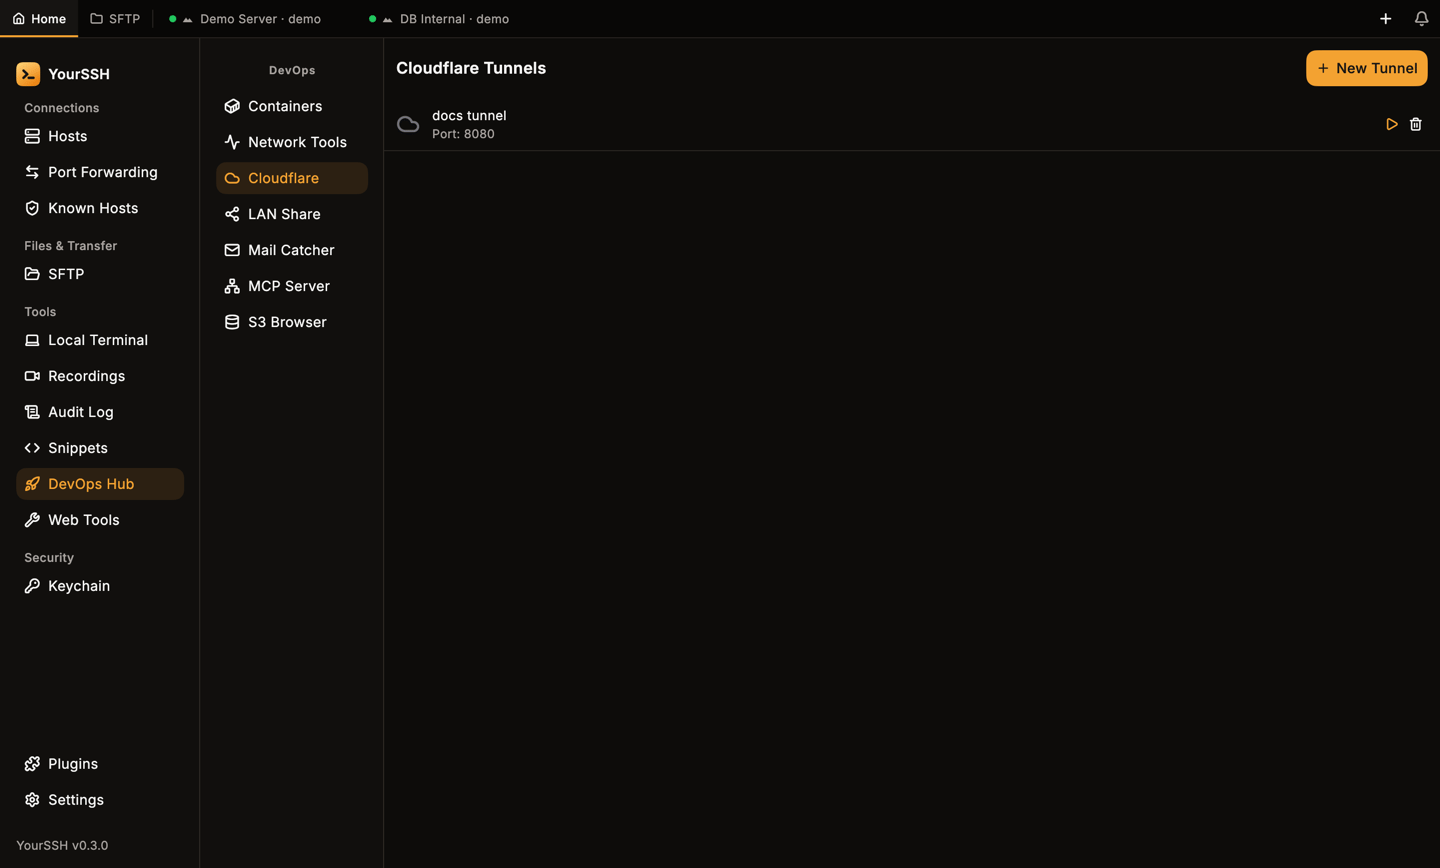
A saved tunnel with its local port, start button and delete button.
cloudflared isn’t installed on the host, starting a tunnel shows an error with the install command.
LAN Share
LAN Share shares one file over HTTP on your local network.- Click Pick File to Share and choose a file on your computer.
- YourSSH generates a local URL on port
8765that contains a random token. Use Copy URL to copy it. The URL uses your Wi-Fi address, so the computer needs to be on Wi-Fi. - Anyone on the same network who has the URL can download the file with a browser. The link is plain HTTP.
Mail Catcher
Mail Catcher starts a small SMTP server on the remote host so you can test the mail your app sends, without delivering it. It needspython3 on the host.
1
Start it
Click the start button (its tooltip reads Start on port 1025). The header then shows Listening on :1025.
2
Point your app at it
Configure the app on that host to send mail to SMTP port
1025.3
Read the mail
Captured messages appear in the list with the sender and time. Select one to see Subject, From, To, Received and the body.
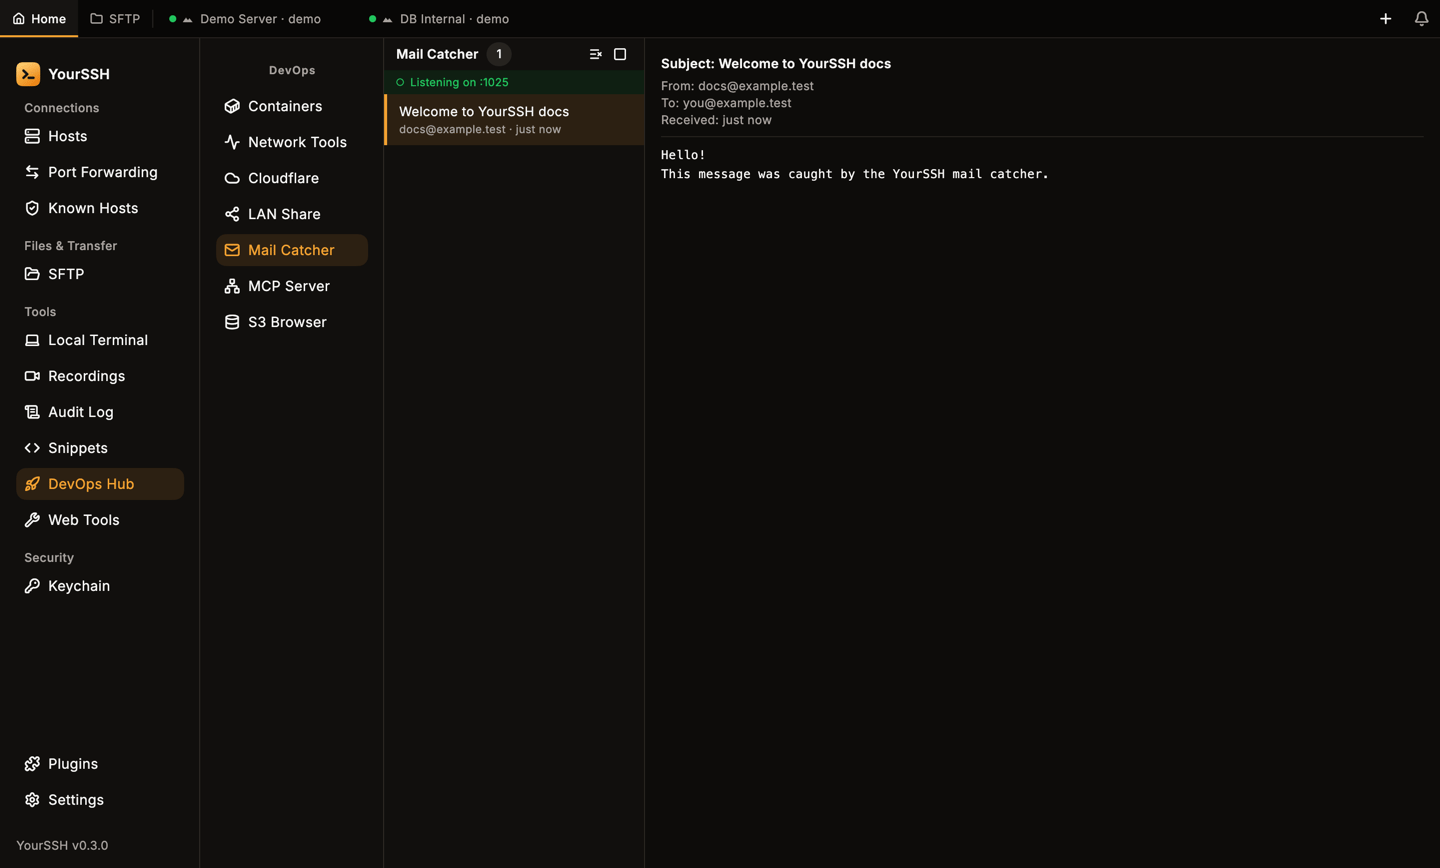
A captured message. The list is on the left and the detail on the right.
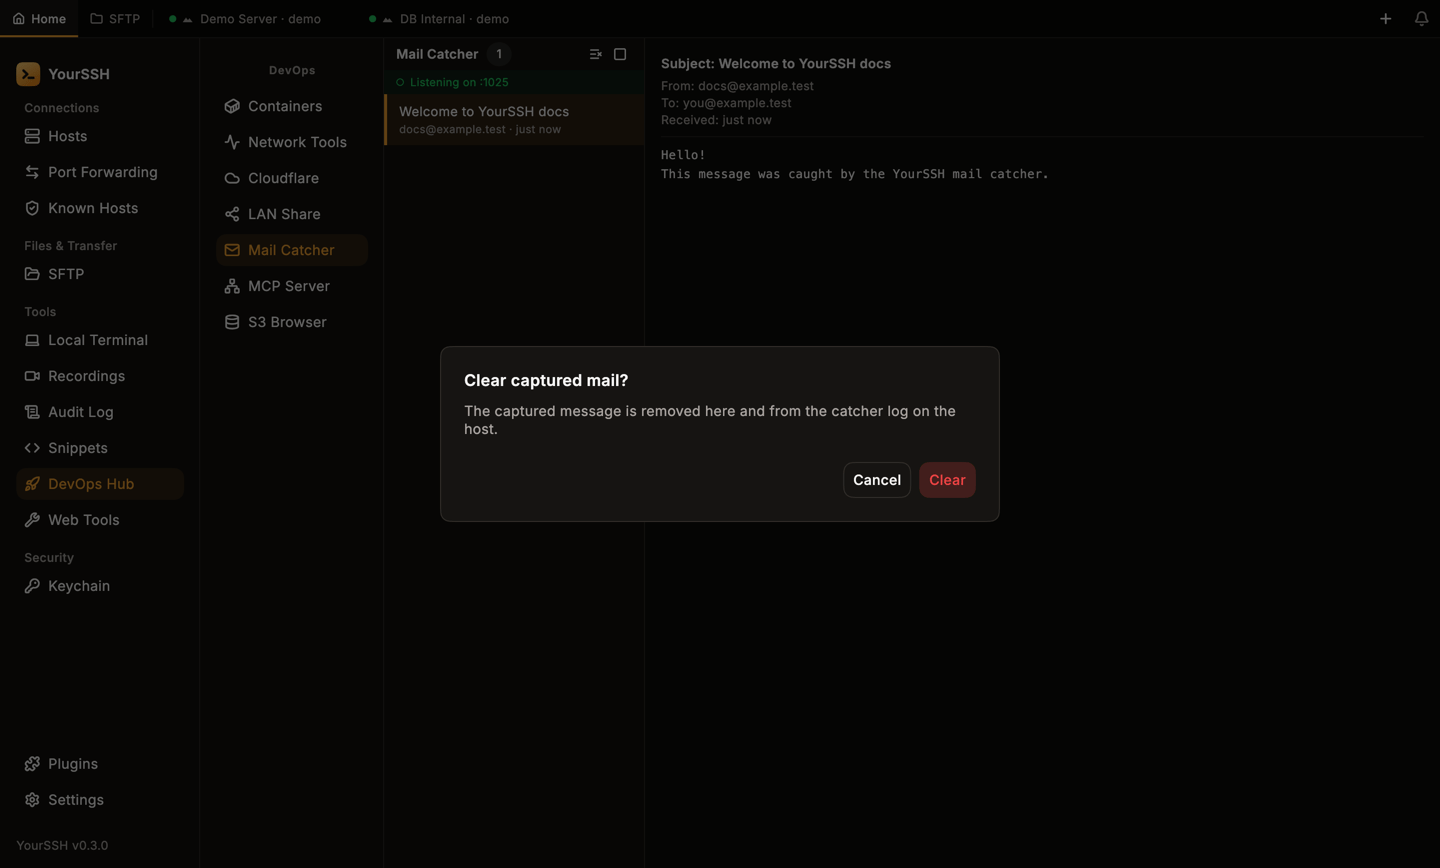
Clear all asks for confirmation before it deletes anything.
MCP Server
MCP Server runs a Model Context Protocol server on the remote host and makes it available on a local port, so an AI client on your computer can use it.- Enter the MCP Server Command that starts the server on the host. The default is
npx @anthropic-ai/mcp-server. - Set the Local Port (default
9090). - Click Start MCP Server.
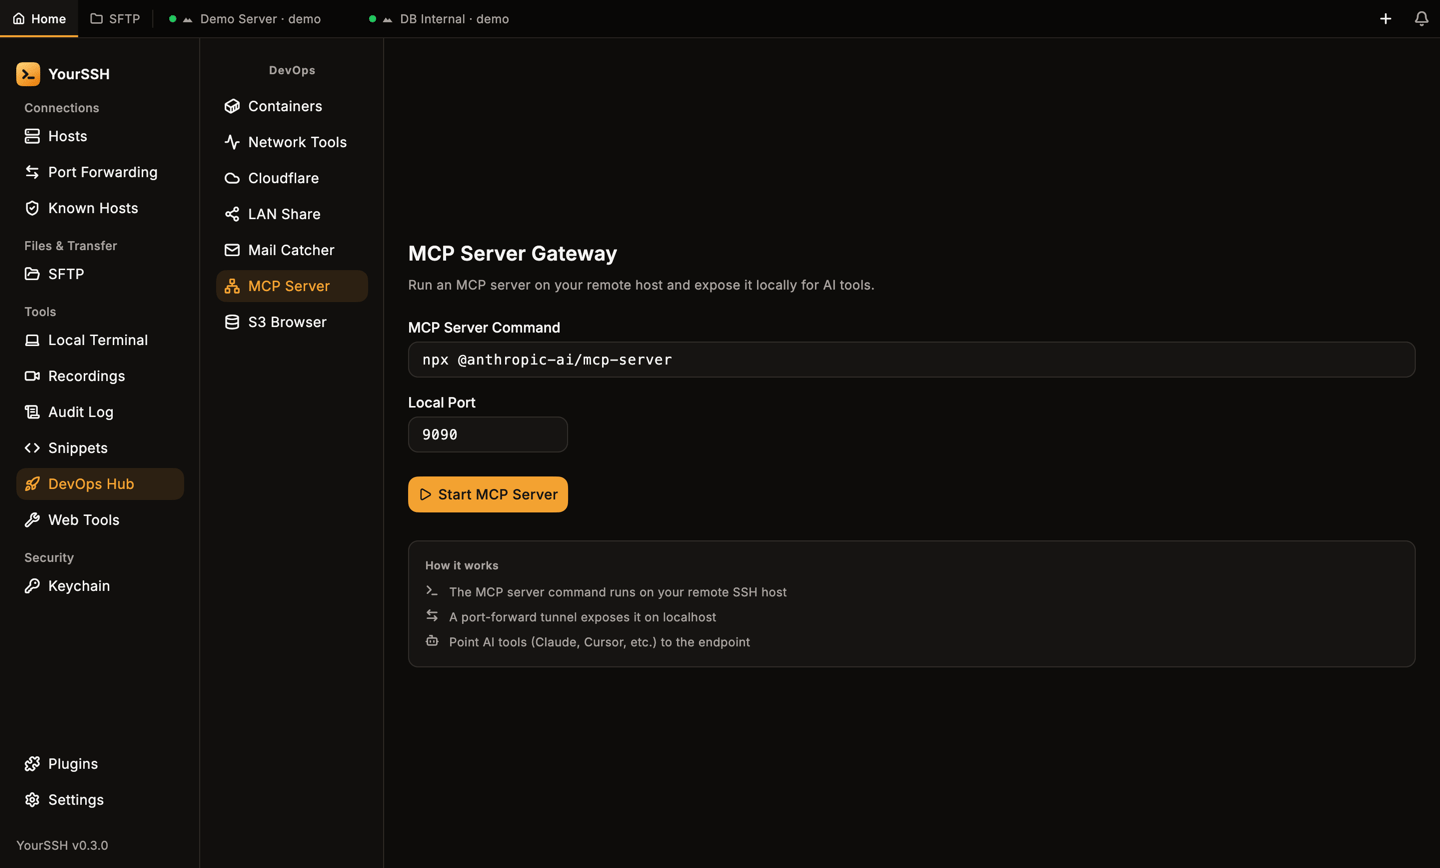
The MCP Server Gateway form.
S3 Browser
S3 Browser browses S3-compatible storage such as AWS S3, MinIO and Cloudflare R2. It talks to the bucket directly from your computer, so it doesn’t need an SSH session.1
Add a bucket
Click Add Bucket and fill in Display Name, Endpoint, Bucket, Region, Access Key and Secret Key. Click Save.
2
Browse
Open the bucket to see its folders and objects. You can upload, create a folder with New Folder, rename or move an object, copy a download URL, download an object to your
Downloads folder and delete objects.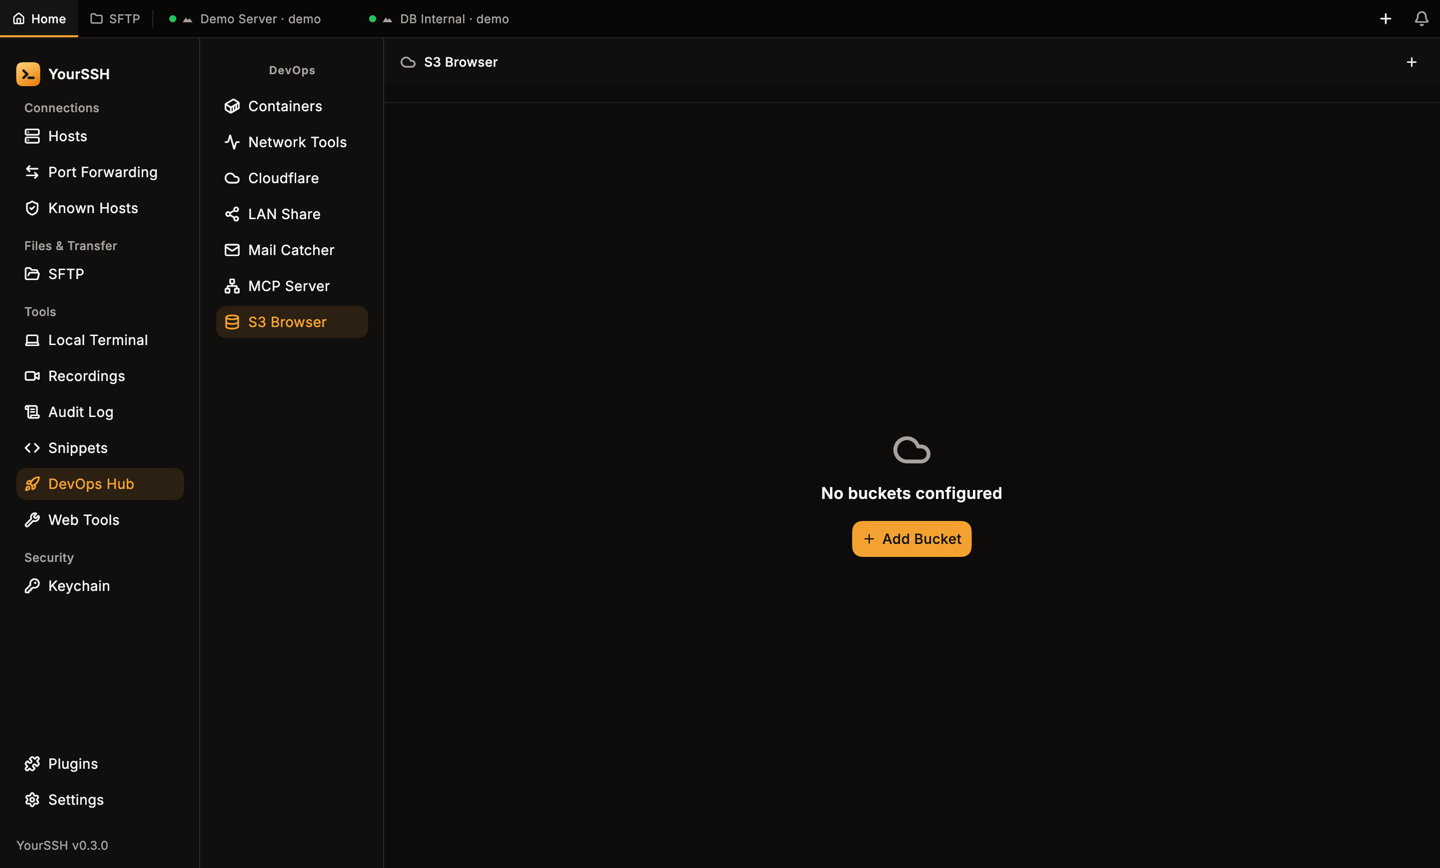
S3 Browser before any bucket is added.
Related pages
Web Tools
HTTP client, utilities and an embedded browser.
Port forwarding
Tunnels behind the MCP server and browser.